How to install BackTrack on Android SmartPhone - The Easiest Way .
Hello guys, today I'm going to show you the easiest way to install BackTrack on an Android SmartPhone.
For this tutorial you need:
1) Rooted android device
2)Linux installer (Can be found on Google play)
3)Zarchiver (Can be found on Google play)
4)Busybox (Can be found on Google play)
5)Android-VNC (Can be found on Google play)
6)Terminal Emulator (Can be found on Google play)





For this tutorial you need:
1) Rooted android device
2)Linux installer (Can be found on Google play)
3)Zarchiver (Can be found on Google play)
4)Busybox (Can be found on Google play)
5)Android-VNC (Can be found on Google play)
6)Terminal Emulator (Can be found on Google play)
All of the programs mentioned above are free.
Ok, now let's start, The first thing you need to do is install Busybox from Google play:

Install it, then open it when it's done, it will install some more things. When it's done, install Linux Installer from Google Play:

Open Linux installer, then click on Install Guides from the list on your right hand side:

When you click that, you'll see a list of Linux distros, click on Backtrack and you will see a screen with steps on how to install it. Now click on the second page of those steps, you will get a page that looks like this:

Just click on "Download Image", and let it finish downloading. While it's downloading, open Google play and install Terminal Emulator, and Zarchiver.
Terminal Emulator:

Zarchiver:

When it finishes downloading, open Zarchiver, and look for the ZIP file that you downloaded, and extraxt the image into a root folder called "backtrack", extract the image into an external memory card not the internal one. Once it's done, open Linux Installer again, and click on launch, you'll get a screen that looks like this:

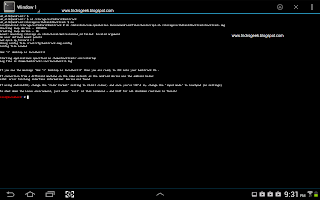
If it didn't recognize any distro, click on Setting > Edit then change the file path there to your backtrack image, the .img file that you extracted. When it finally say "backtrack" on the drop down list, click "Start Linux" Terminal Emulator will open, you just have to proceed with the installation steps, ask you for a new password, and some preferences. When it's done you will get a red "root@localhost~#" like the picture bellow:

You are now in backtrack! Now if you want backtrack in GUI, open Google play, and install Android VNC:

Open It when it finishes installing, and it will look like this:

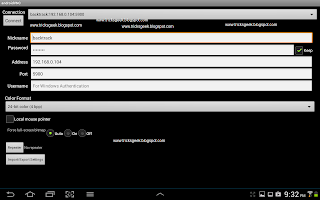
Set to the same settings in the picture, but not the IP address, you can get your IP by opening backtrack terminal, in terminal emulator, and running "ifconfig" command:

Settings for VNC are, Username: backtrack Password: backtrac IP: from the "ifconfig" command or just put 127.0.0.1 Color Format: 24-bit
Now click connect, and boom! You are in BackTrack Desktop!

When you finish using it, remember to disconnect VNC AND exit backtrack in Terminal Emulator, else it will be taking your battery in the background.

And note that Ubuntu can also be installed in the same exact way, just the username and password for VNC will change. That's it guys, enjoy!
Labels: Android Tricks, Backtrack 5, How to install BackTrack on Android SmartPhone - The Easiest Way, Install BackTrack 5 on your Android SmartPhone, Jagdeep, Jagdeep Gill, Jagdeep Gill Production, Jagdeep-Gill, PC Tricks, Tricks Geek


